Quickstart
Get from zero to a working PRD in under 5 minutes.
Onboarding an existing repo?
This guide assumes a new or empty project. If you're adding ndx to a codebase that already has real history, see Existing project onboarding — it adds a pre-flight cleanup pass and .gitignore setup.
Prerequisites
- Node.js ≥ 18 (Node 22 LTS recommended)
- pnpm ≥ 10 — install pnpm
1. Install
Recommended: install @n-dx/core globally with npm.
npm install -g @n-dx/coreOther package managers
# pnpm (equivalent; preferred if you already use pnpm)
pnpm add -g @n-dx/core

# yarn (best-effort — not part of our tested path)
yarn global add @n-dx/core
Prefer not to install globally? Run one-off with npx -p @n-dx/core ndx <command> (the -p @n-dx/core ndx form is required — bare npx @n-dx/core does not work).
2. Initialize
Navigate to your project and run:
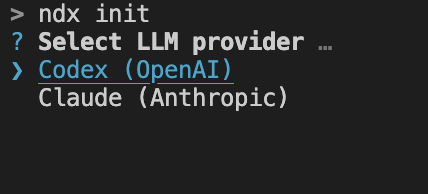
ndx initYou'll first be asked to choose an LLM provider (Claude or Codex):
Then you'll pick a model for that provider, after which init runs to completion:
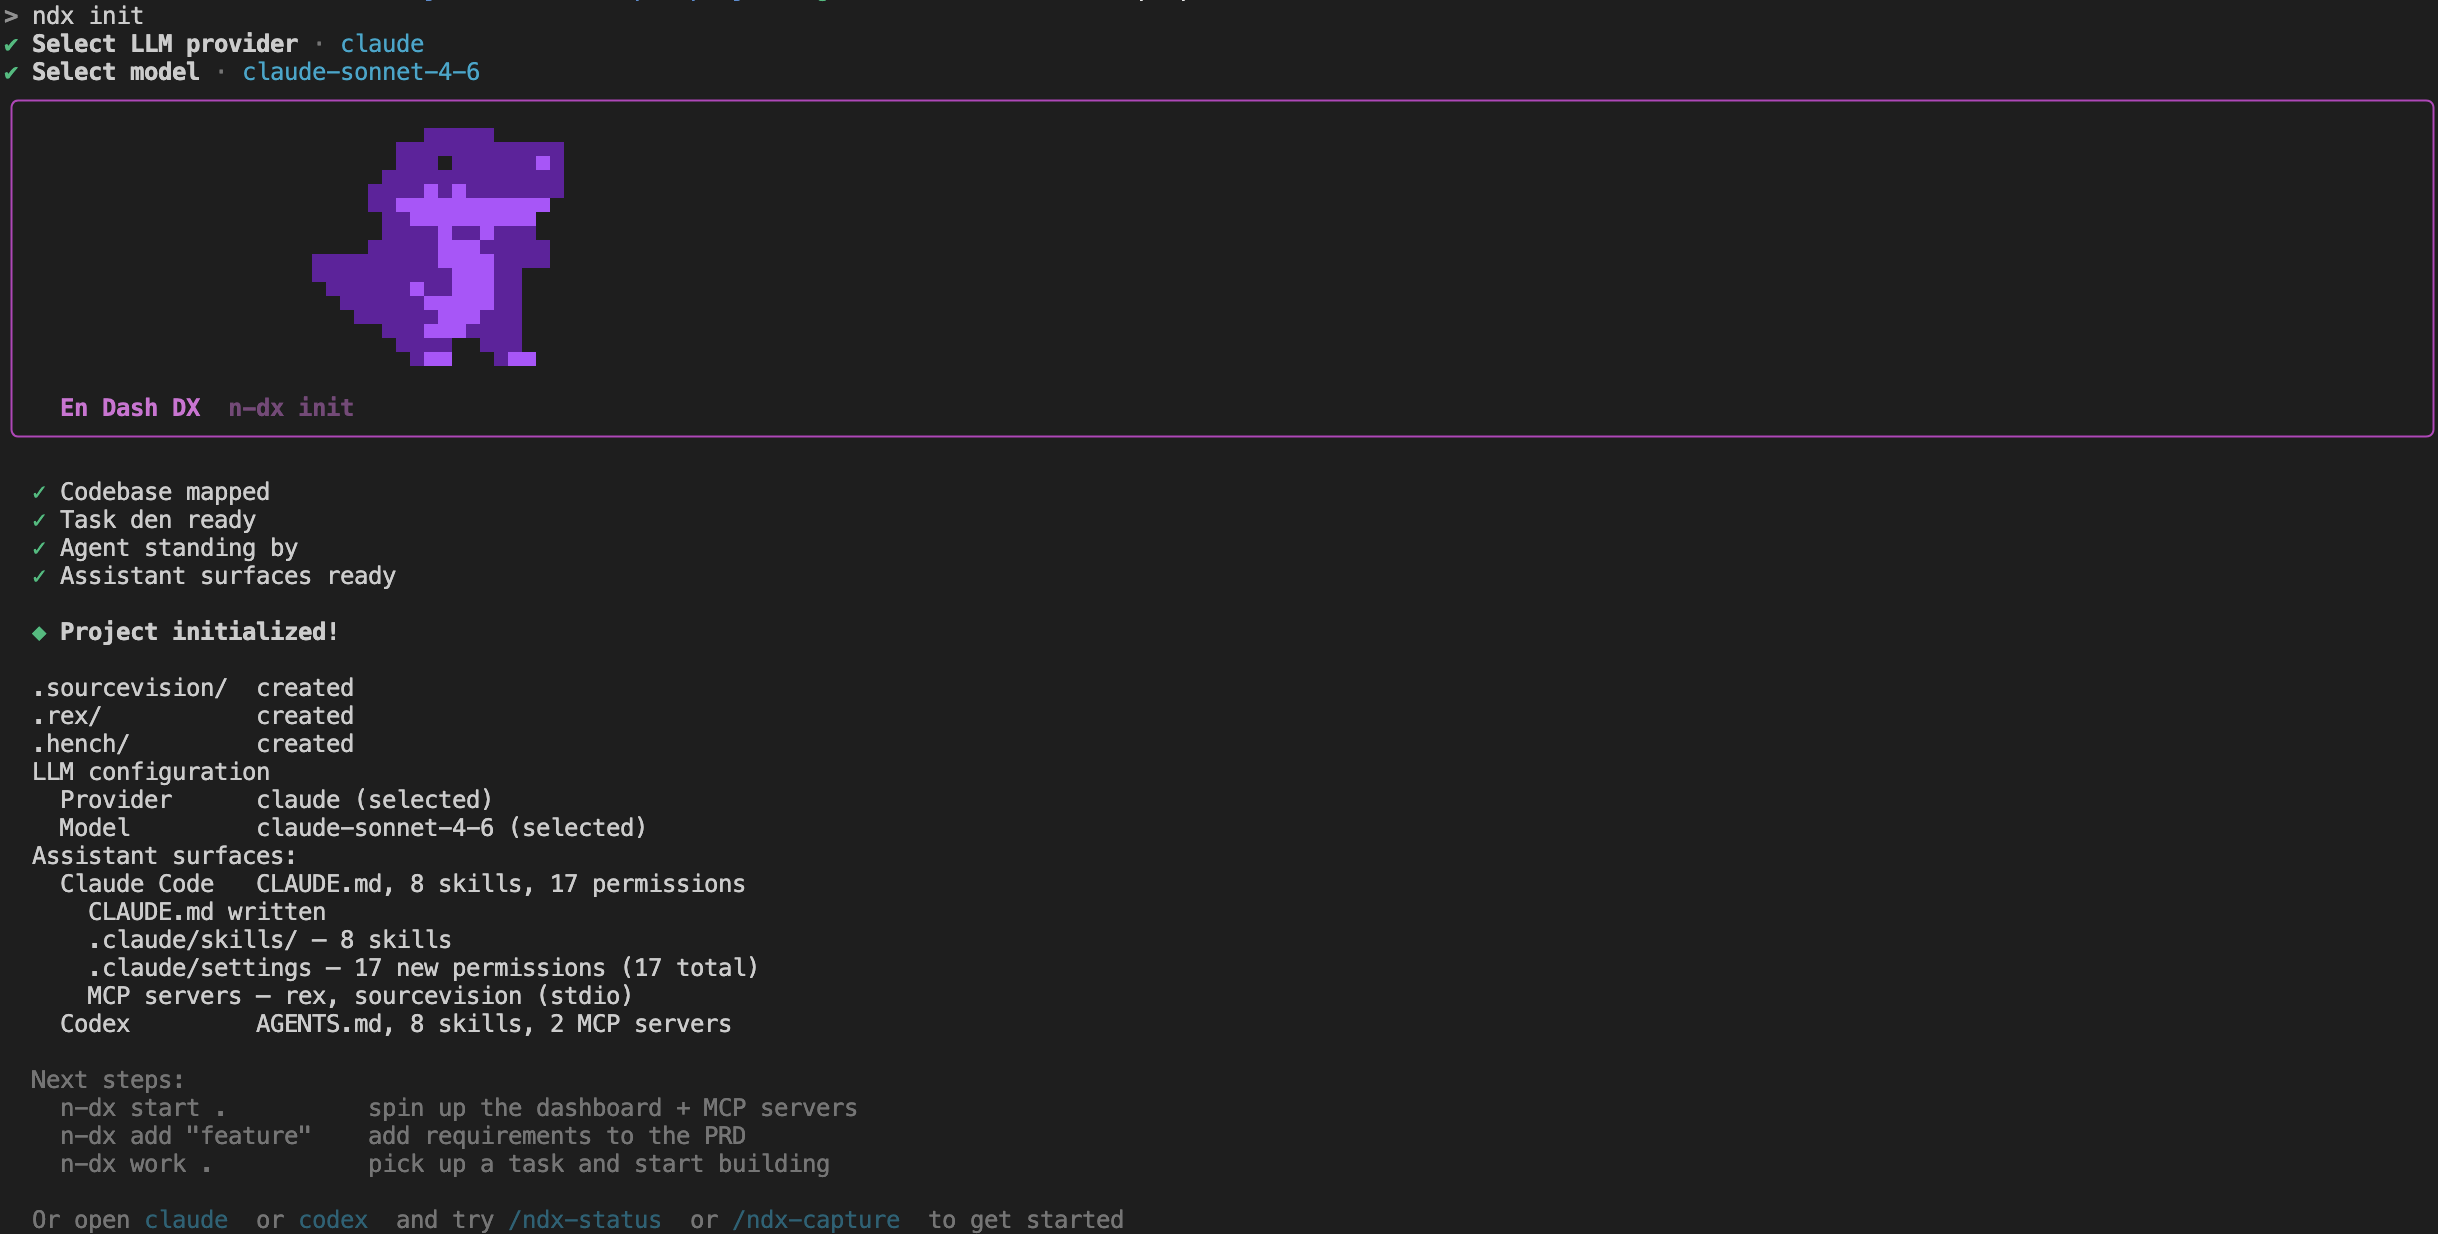
The init command sets up everything — analysis metadata, PRD storage, agent configuration, and assistant-specific artifacts:
- Claude:
CLAUDE.md,.claude/skills/,.claude/settings.local.json, MCP server registration - Codex:
AGENTS.md,.agents/skills/,.codex/config.toml
By default both surfaces are provisioned. Use --claude-only or --codex-only to limit to one assistant.
Already initialized?
Running ndx init again is safe. It detects existing assistant surfaces and reuses them. If only one assistant's artifacts exist, re-init skips the other unless you explicitly request it.
Set up .gitignore before your first commit
ndx init only gitignores .n-dx.local.json automatically. Before committing anything else, add the recommended ignore patterns so ephemeral runs, caches, and PID files stay out of version control.
3. Add to the PRD
ndx add "<describe what you want to create>"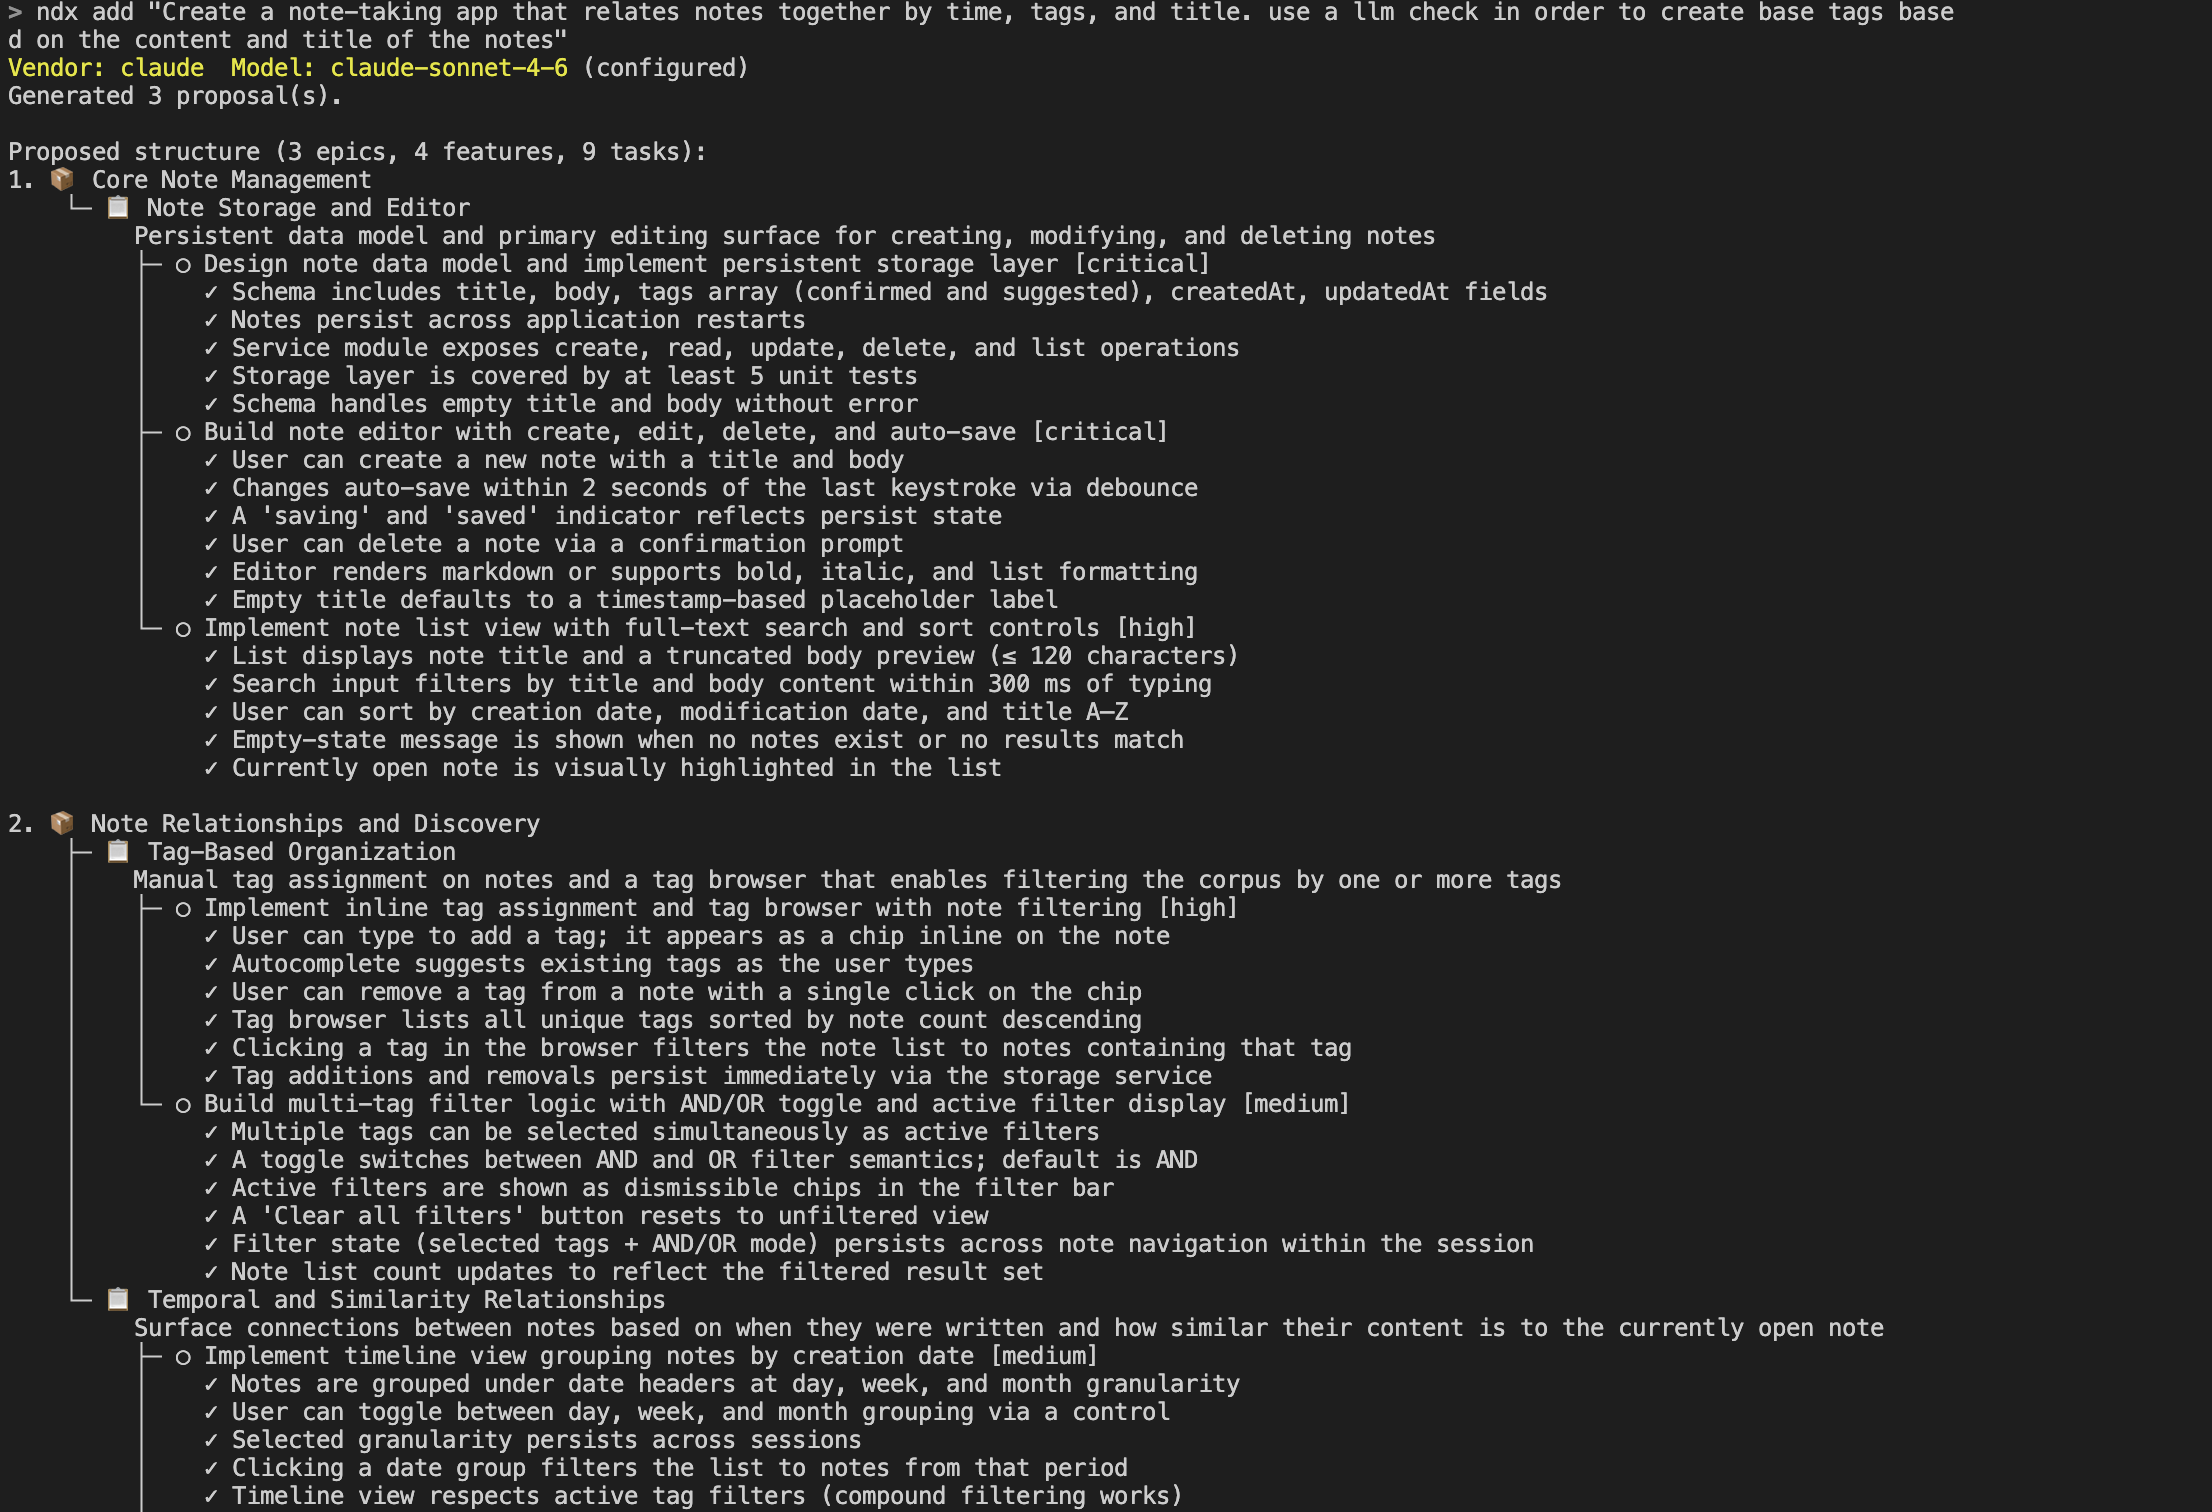
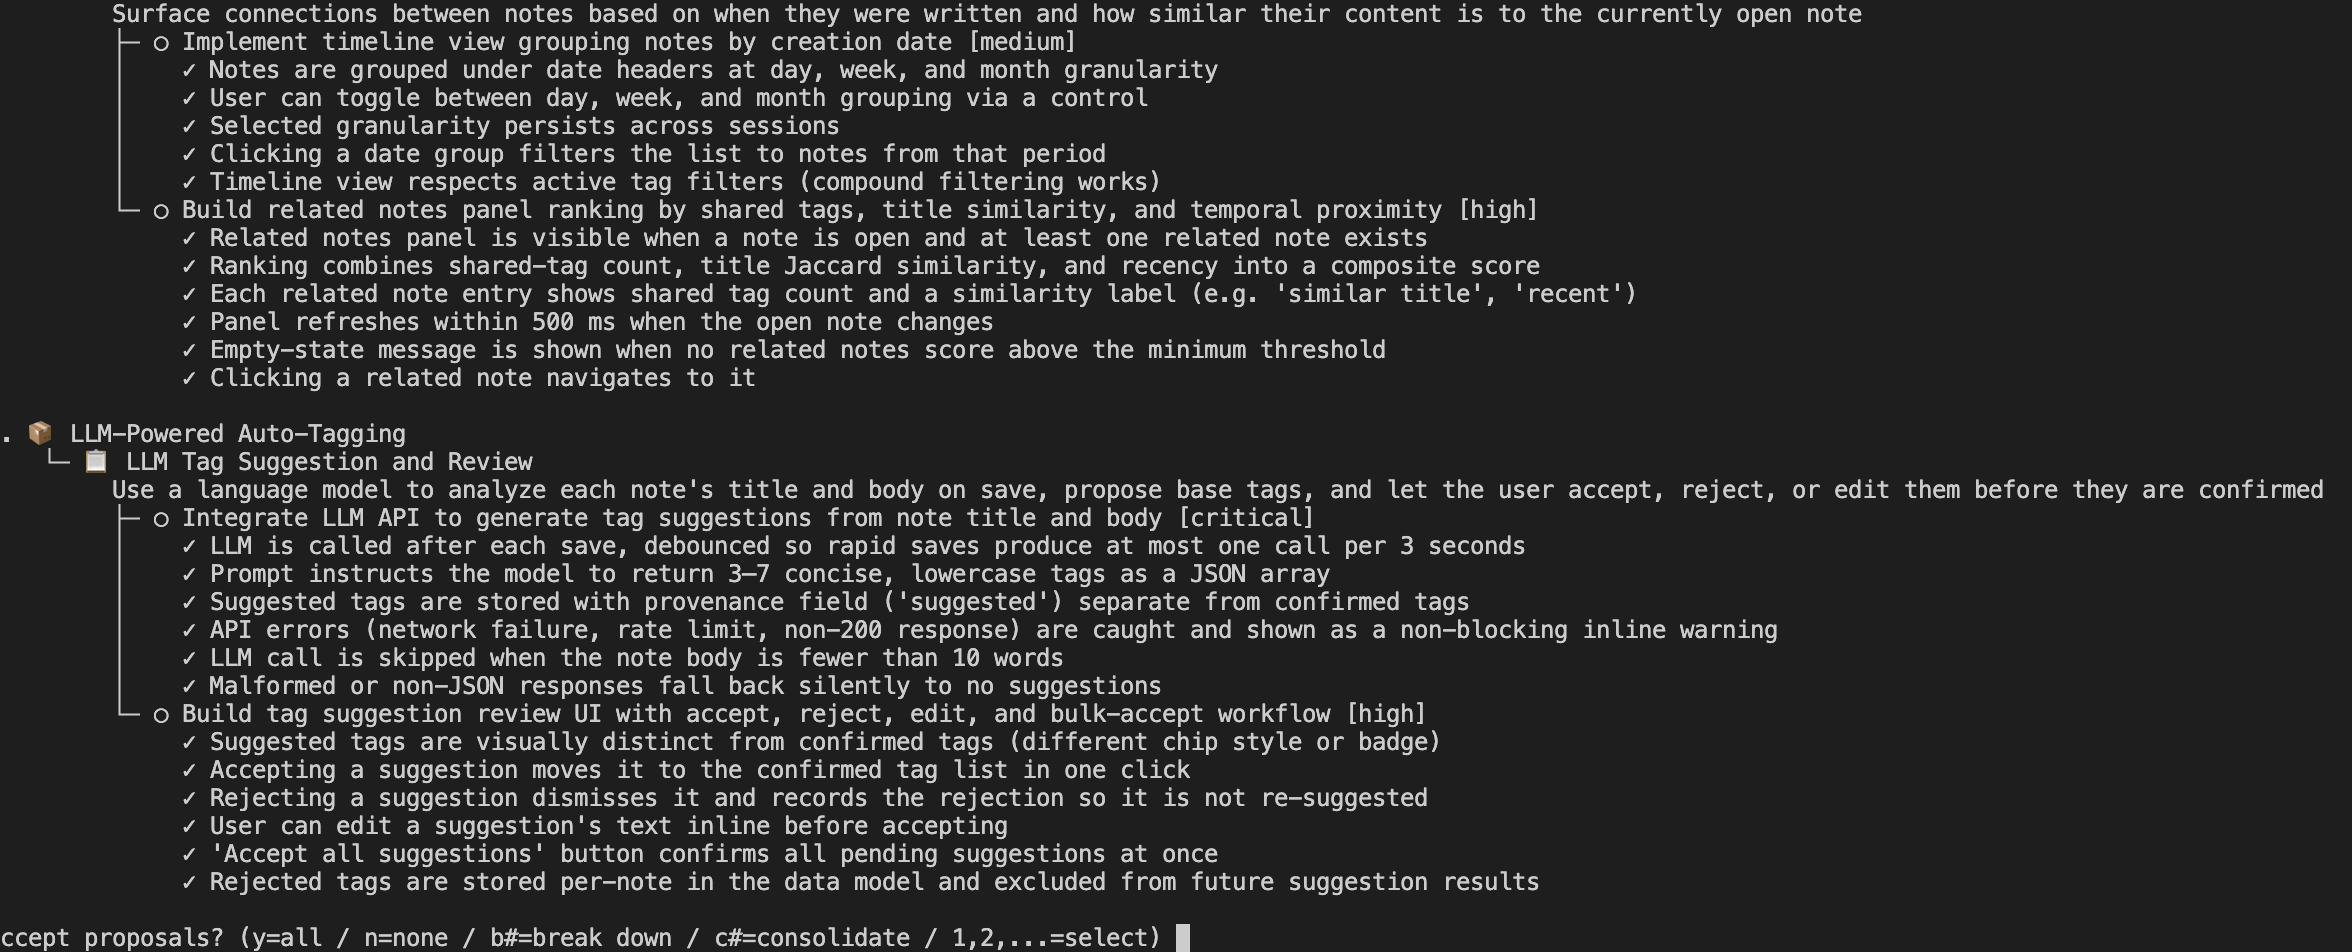
ndx add takes your natural-language description, asks the configured LLM to draft a PRD proposal (epics → features → tasks), and prints it for review. At the bottom you'll see:
accept proposals? (y=all / n=none / b#=break down / c=consolidate / 1,2,…=select)Press y to accept everything into .rex/prd_tree/, or pick specific items.
4. Work on the PRD
ndx work --auto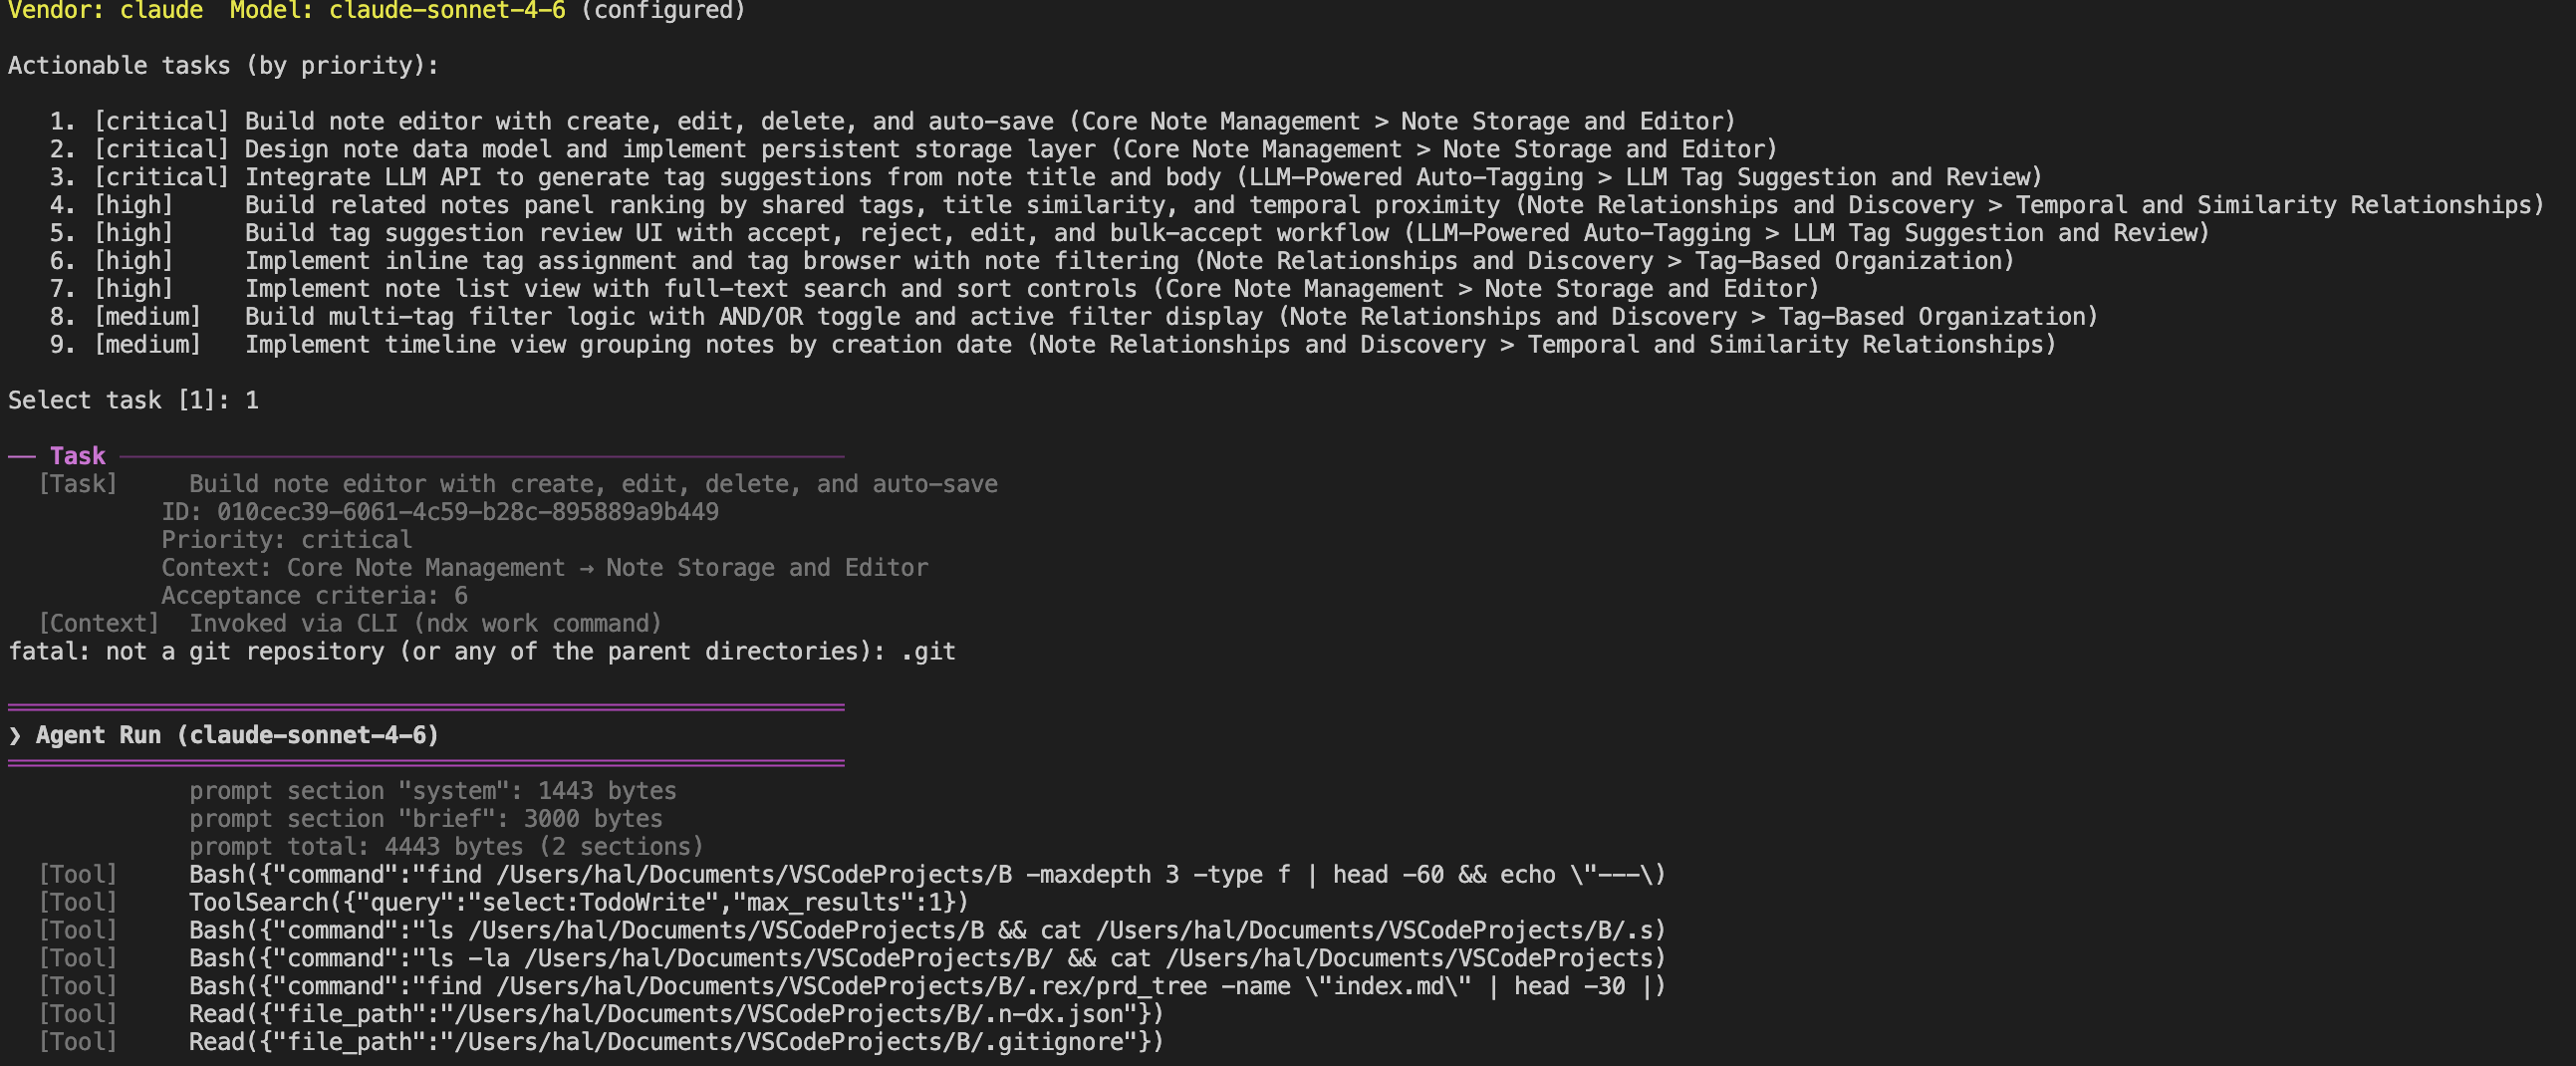
The agent picks the highest-priority pending task, builds a brief with codebase context, runs an LLM tool-use loop to implement it, and records the results.
5. Check progress
ndx status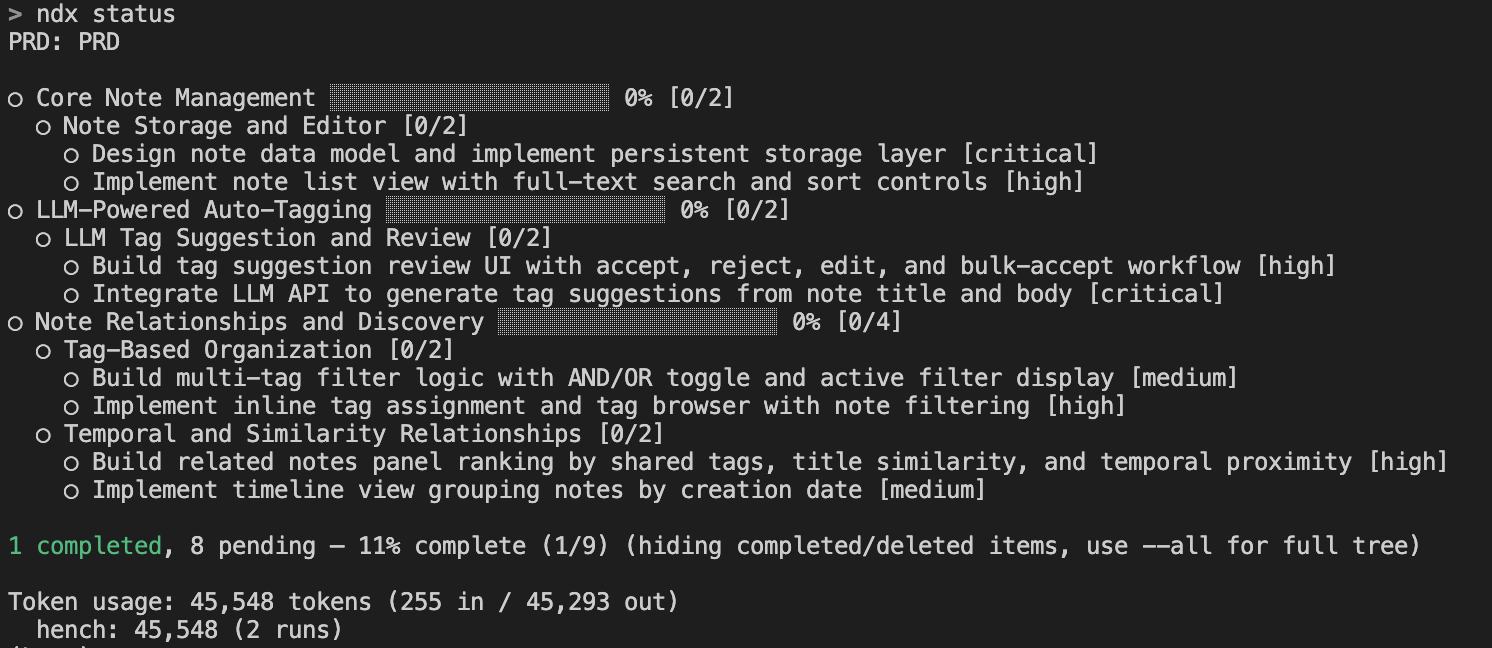
You'll see a tree of epics, features, and tasks with completion stats.
6. Analyze your changes (optional)
Check how your PRD has been implemented:
ndx analyze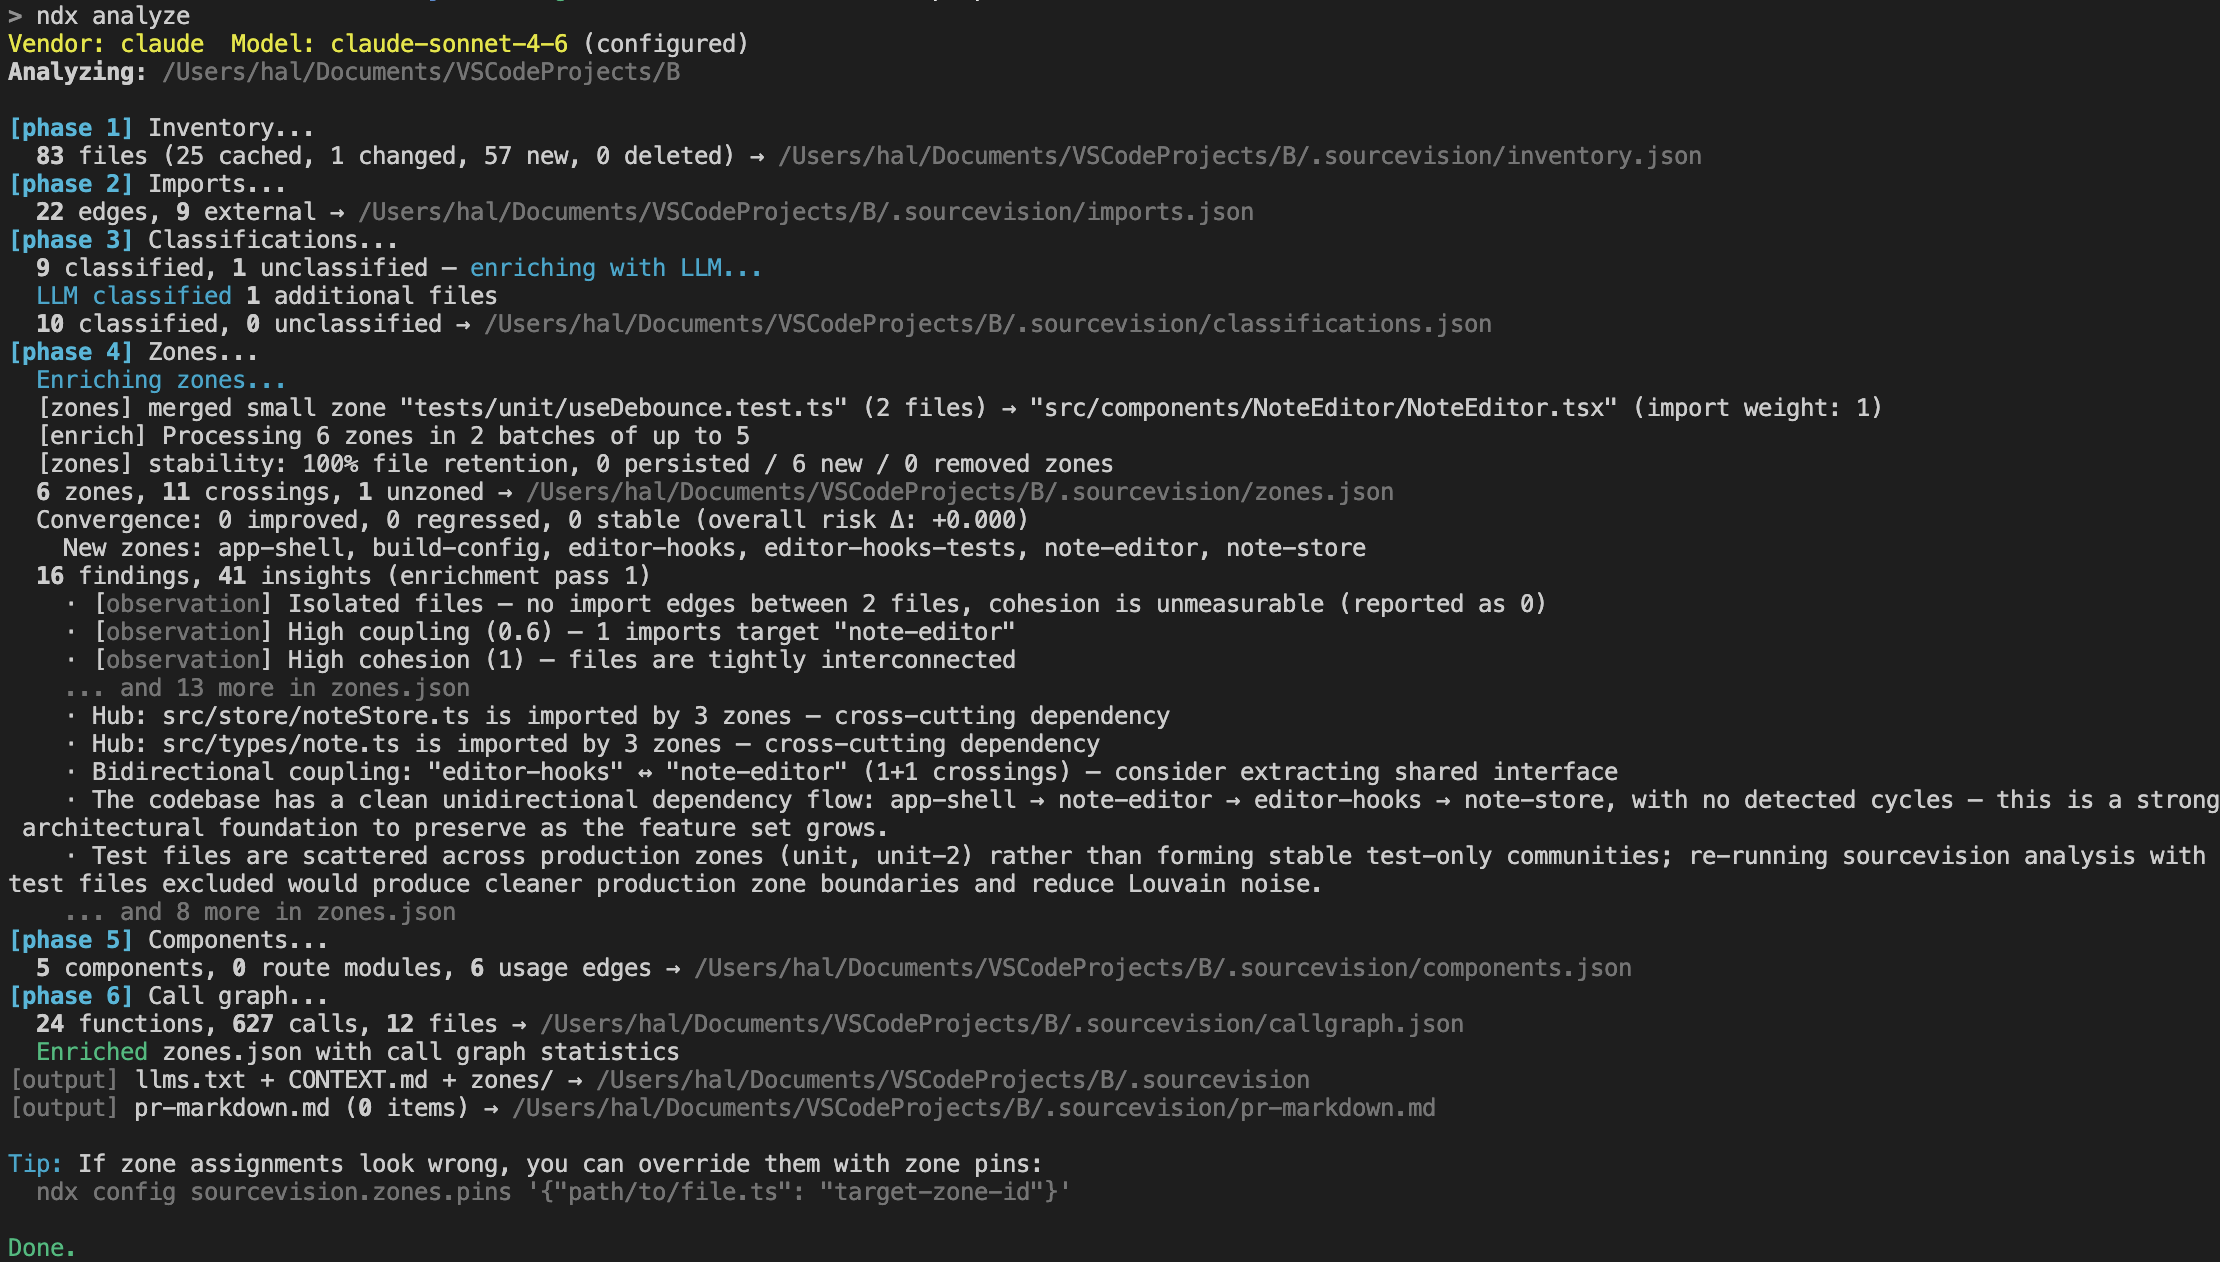
Analyze writes only to .sourcevision/ — file inventory, import graph, zones, findings. No PRD changes yet. Then read what it found:
ndx recommend --actionable-only
Skim .sourcevision/CONTEXT.md for the AI-readable summary, and use the recommend output to see what ndx thinks needs work. The goal here is a mental model — you don't need to act on anything yet.
7. Start the dashboard
ndx start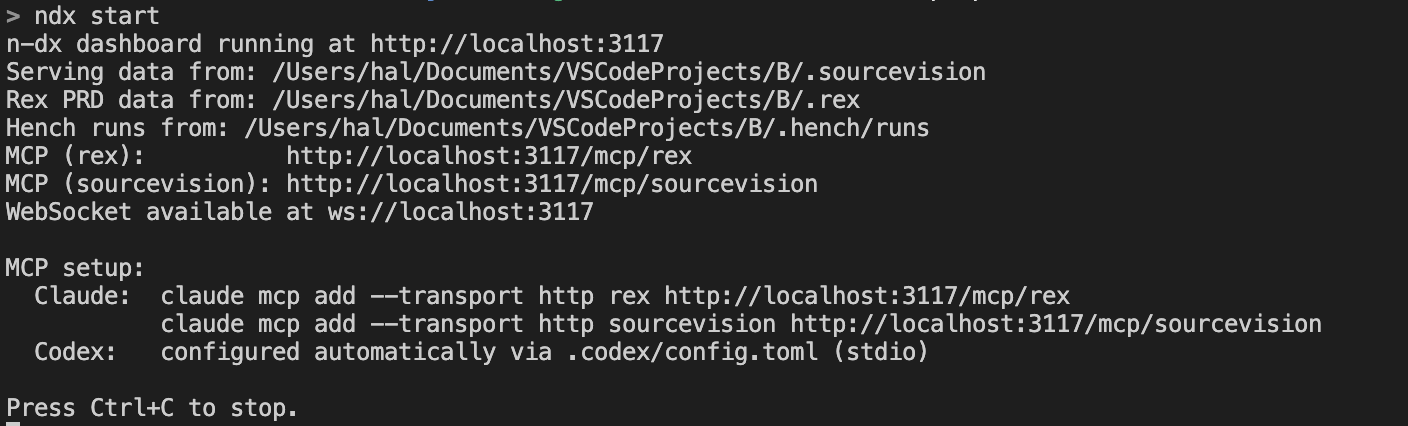
Opens a web dashboard at http://localhost:3117 with interactive views of your codebase analysis, PRD tree, and agent runs.
What's next?
- Open your assistant:
claudeorcodex— your assistant reads its instruction file and discovers skills automatically - Add your own ideas:
ndx add "Add SSO support with Google" . - Run multiple tasks:
ndx work --auto --iterations=4 . - Self-healing loop:
ndx self-heal 3 .(analyze → recommend → work, repeated) - Submit feedback:
/ndx-feedback "description"— files a GitHub issue with context - Assistant surfaces: Getting Started — Assistant Surfaces
- Full command reference: Commands
- Workflow guide: Workflow
- .gitignore setup: .gitignore for ndx projects
Skills installed by ndx init
ndx init writes workflow skills into your assistant's skill directory. They are available as slash commands in your next Claude Code or Codex session:
| Skill | Role in this guide |
|---|---|
/ndx-work | Step 4: executes PRD tasks with codebase context and workflow discipline |
/ndx-status | Step 5: shows the PRD tree with per-epic completion stats |
/ndx-capture | Step 3 alternative: adds freeform ideas as structured PRD items without leaving the chat |
/ndx-feedback | What's next: files a GitHub issue with your environment details automatically included |
For the full skill inventory and customization guidance, see the Skills Reference.